Crafting the Perfect Smile: How Dental Veneers Are Made in the Dental Lab

Dental veneers are a popular cosmetic dentistry solution, transforming smiles by correcting imperfections like discoloration, chips, or misalignment. These thin, custom-made shells are designed to cover the front surface of teeth, creating a natural and aesthetically pleasing appearance. But how are veneers made? The process involves advanced technology, skilled craftsmanship, and attention to detail in a dental laboratory. In this blog, we’ll take you behind the scenes to explore how dental veneers are crafted in the dental lab.
The journey of a dental veneer begins at the dentist’s office, where the process starts with a consultation. The dentist evaluates the patient’s teeth, discusses their aesthetic goals, and determines if veneers are the right solution. Once approved, the dentist prepares the teeth, which may involve removing a thin layer of enamel (typically 0.5–1 mm) to ensure a natural fit.
Next, precise impressions of the patient’s teeth are taken. These impressions can be made using traditional dental putty or advanced digital scanning technology. The impressions capture the exact shape and size of the teeth, serving as the foundation for creating custom veneers. The dentist also records the desired shade and any specific aesthetic preferences to ensure the veneers match the patient’s natural smile.
Once the impressions are taken, they are sent to a dental laboratory, where skilled technicians take over. Along with the impressions, the dentist provides detailed instructions, including the patient’s tooth shade, desired shape, and any special considerations (e.g., matching the translucency of adjacent teeth). In some cases, photos of the patient’s smile are included to help the lab achieve a natural look.
In the dental lab, the process of creating veneers combines artistry and technology. Here’s how it unfolds:
The lab begins by using the impressions to create a physical or digital model of the patient’s teeth. For traditional impressions, a stone model is poured using dental plaster. For digital impressions, a 3D model is generated using computer-aided design (CAD) software. This model serves as the blueprint for crafting the veneers.
Modern dental labs often use CAD/CAM (Computer-Aided Design/Computer-Aided Manufacturing) technology to design veneers with precision. Using specialized software, technicians design the veneers to match the patient’s tooth shape, size, and desired aesthetics. The software allows for fine adjustments to ensure the veneers fit perfectly and complement the patient’s smile. Factors like tooth curvature, surface texture, and alignment are carefully considered to achieve a natural appearance.
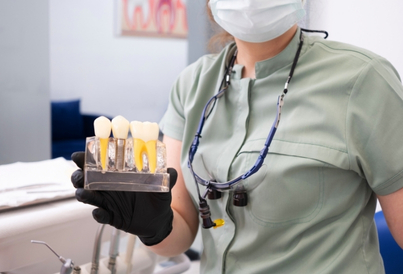
Veneers are typically made from one of two materials: porcelain or composite resin. Porcelain is the most common choice due to its durability, stain resistance, and ability to mimic the translucency of natural teeth. Composite resin veneers, while less expensive, are often fabricated chairside by the dentist rather than in a lab, so we’ll focus on porcelain veneer production here.
Porcelain veneers can be made from various types of ceramic, such as:
The choice of material depends on the patient’s needs, such as the level of translucency required or the strength needed for the veneer.
Once the design is finalized, the veneers are crafted using one of the following methods:
For materials like lithium disilicate or zirconia-based porcelain, the veneers are often milled from a solid block of ceramic using a CNC (Computer Numerical Control) milling machine. The CAD design guides the machine to carve the veneer with incredible precision, ensuring a perfect fit. After milling, the veneer may undergo additional shaping or polishing to refine its contours. Layering Technique
For feldspathic porcelain veneers, technicians may use a layering technique. Thin layers of porcelain are applied by hand onto the model, with each layer carefully shaped and fired in a high-temperature oven to achieve the desired shape and translucency. This method allows for highly customized aesthetics, as technicians can add subtle variations in colour and texture to mimic natural teeth.
After shaping, the veneers are fired in a dental furnace to harden the porcelain and enhance its strength. Multiple firing cycles may be used to build up layers or adjust the shade. Once the veneer is fully formed, a glaze is applied to give it a smooth, natural shine that resembles tooth enamel. The glaze also helps protect the veneer from staining and wear.
Before the veneers are sent back to the dentist, they undergo rigorous quality control. Technicians check for:
Once completed, the veneers are sent back to the dentist, typically within 1–2 weeks. The dentist checks the fit and appearance, often placing temporary veneers to allow the patient to preview the results. During the final appointment, the veneers are bonded to the teeth using a strong dental adhesive, activated by a curing light. The dentist makes any final adjustments to ensure comfort and a seamless fit.
The process of making dental veneers in the lab is a blend of cutting-edge technology and skilled artistry. From digital design to meticulous hand-layering, every step is tailored to create a restoration that looks natural, feels comfortable, and lasts for years. Advances in materials and CAD/CAM technology have made it possible to produce veneers with unparalleled precision, while the expertise of our dental technicians at Precision Smiles Dental Lab ensures each veneer is a work of art.
Dental veneers are more than just a cosmetic fix—they’re a testament to the precision and craftsmanship of modern dentistry. By understanding the intricate process of how veneers are made in the dental lab, patients can appreciate the effort that goes into crafting their perfect smile. If you’re considering veneers, consult with your dentist to learn more about how this transformative treatment can enhance your confidence and oral health.